Results

|
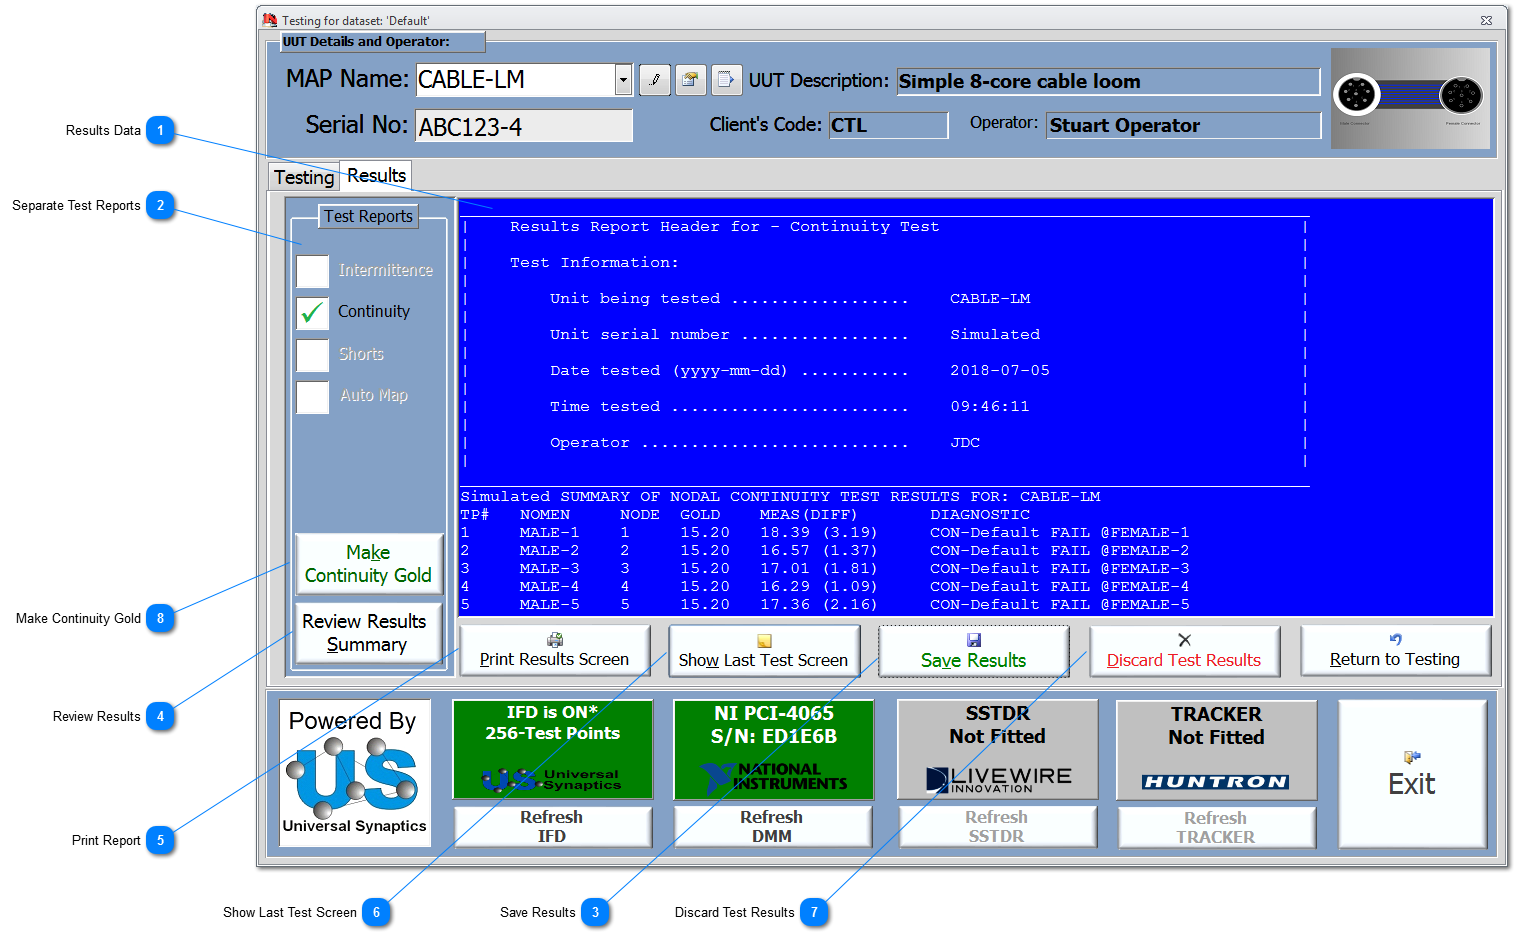
Compiles the separate reports for all of the tests that have been carried out, except Automap™, into 2 combined report formats {Map_Name}.TST (summary of results) and {Map_Name}.TZT (full results); these text files are both saved to the Map Name folder in the TestPrograms folder. See Folder Structure for more details. This button only becomes available if there are test results and associated reports to compile.
If the reports are successfully compiled, then the results data is then error checked and imported into NODES™ database. Importing the results data into NODES™ allows the User to carry out a full review of the results and the opportunity for further analysis; they can then be used in result related reports. Test results will only be imported once from the referenced file, and then the .TST and .TZT files are then marked as archived and date time stamped and are left in the TestPrograms folder.
|
|
Click to review all the results data held for the connected dataset. The Results Review form allows users to navigate all the results for Intermittency, Continuity and LogScope™, and filter the results by UUT, Serial No and other User defined parameters.
|
|
Click to show a simple report output of the data displayed in the adjacent blue field. From the Print Results Screen, the User will be given the option to print or save the data.
|
|
This function should be used to save a Gold copy of test results when a UUT, known to be fully serviceable, has had the continuity test carried out on it. It is recommended that for correct and accurate assessment of any UUT, it should always be compared to the desired Gold values. In addition, because no two units will ever behave exactly the same under test, the Gold values can have allowable tolerances applied to each TP in the Test Point Add/Edit form. By applying specific tolerances to each test point's Test Profiles, this allows acceptable variation in UUTs from being rejected as test failures. Updates to a filtered selection of TPs can be performed using Block Updates under the Test Point Add/Edit form.
|
