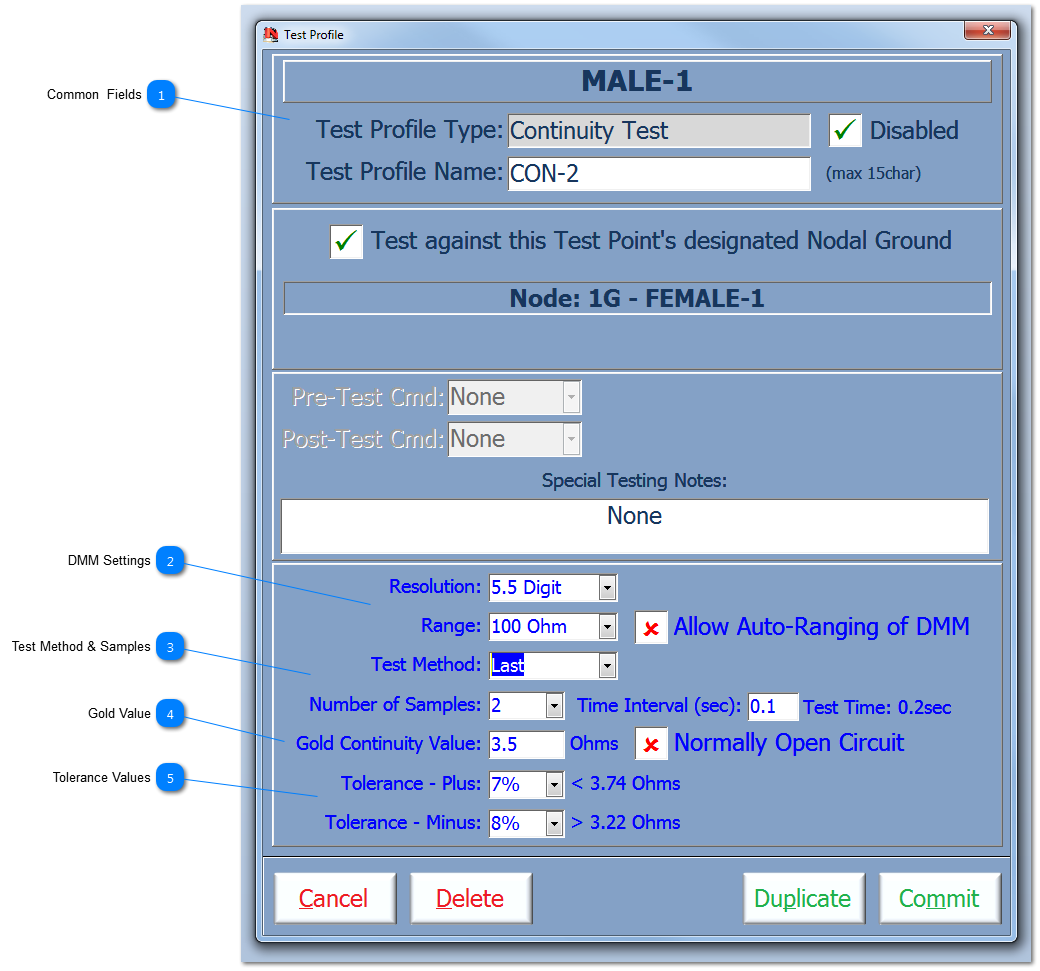
The DMM settings can be forced to certain settings for Resolution and Range for each Test Profile. This ensures that the DMM is optimise for the specific TP, and this helps the test to run faster. In addition if the Allow Auto-Range of DMM is unchecked (as show above), then the DMM will not Auto-Range during the measurement of the TPs, and if it is out of range then it will just report a POC (possible open circuit); this function increases the speed of the test process dramatically.
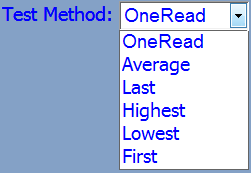
The Test Method allows each Test profile to be tailored for each TP. The Test Methods allowed are shown below and the resultant measurement is calculated based on the selected Test Method and the number of samples taken at the time of test. The 'Default' options uses the Test Method set by the User in the Preferences.
Number of Samples is set to 1 as the default and the Test Method defaults to 'OneRead'. If more samples are required for a specific Test Profile, then they can be set by the User.
If more than 1 sample is set, the User will have the option to set the time interval (in decimal seconds) between each sample. Note that the total time to carry out the complete the Test Profile will be calculated and displayed. For example 10 samples at 0.5sec each will take 5seconds; this might not seem a great deal of time, but if the UUT has 50 TPs with Test Profiles with similar settings, then the total time for the UUT to be tested could be well over 4mins long. If more than sample is set, then default is set to 'Last', and can be changed by the User.
The Gold value is referred throughout the Continuity testing topics. It refers to the continuity value which can be either, the theoretical value of the TP to the TP that has been designated as the partnering TP (for the Default Test Profile, this is the value from itself to the nominated Nodal Ground). The Gold can also be a measured value from either a previous continuity test or an AutoMap™ routine or a Click&Test™ using LogScope™ (for the Default Test Profile).
The Gold value can be set to be Normally Open Circuit. This might be useful when testing a switch arrangement, where one Test Profile can be created for the closed circuit operation, and another Test Profile can be created to check the Closed circuit operation of the switch; of course the use of Pre&Post Cmd message boxes could be used to halt the test process and then remind the User to make or break the switch as required.
These fields are used to set the tolerances that will be used during the Continuity test using this profile.
Both Tolerance fields can be expressed in a number of different formats, ie as a absolute value in Ohms or as percentage of the Gold value. If the value is in the 'Plus' field, then this tolerance is added to the Gold value; conversely if the value is in the 'Minus' field then this tolerance is subtracted from the Gold value. These upper and lower tolerances are then compared to the measured value. Examples formats are as follows:
5% Þ 5% is either added or subtracted to the Gold value for comparison.
23 Þ23 Ohms is either added or subtracted to the Gold value for comparison.
1.5k Þ1.5k Ohms is either added or subtracted to the Gold value for comparison.
Null Þthe default tolerance set in the Testing Parameters is applied during the test.
The Upper and Lower tolerances are calculated on leaving the respective field to allow the User to see the tolerance band applied in Ohms.