NODES™ Options
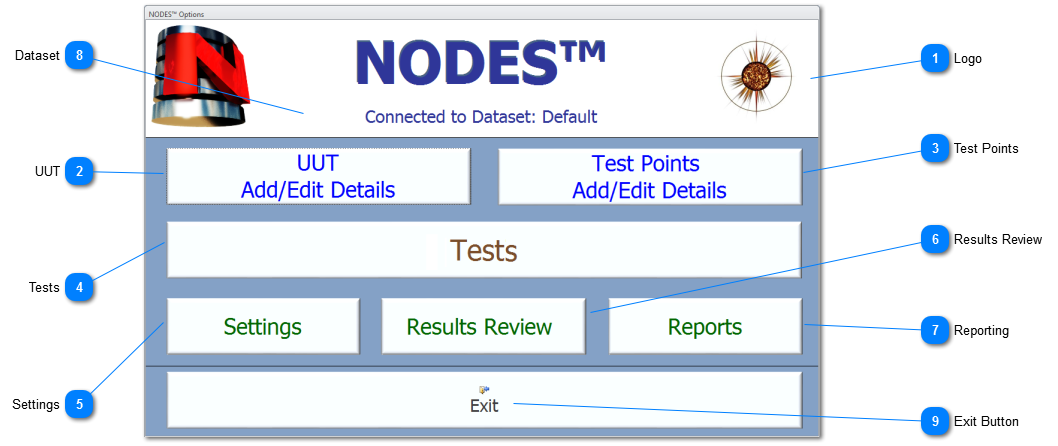
UUT Click to navigate to the summary details for all the UUT held on the displayed Data. The UUT Summary form allows the User to add new UUT, copy a UUT and edit existing UUT details.
|
Test Points Click to display all the Test Point Data for the current UUT ie the last UUT that was accessed, edited or used by any part of the NODES™ software. If the User needs to access another UUT, then use the UUT Add/Edit Details button.
|
Tests Click to display the various Tests, and other access to UUT settings/Testing Parameters.
|
Settings Click to navigate to the Administration Switchboard. From this Switchboard the User can access a range of administration functions including Company Details, User Preferences, Dataset Management etc.
|
Results Review Click to review all the results data held for the connected dataset. The Results Review form allows users to navigate all the results for Intermittency, Continuity and Shorts, and filter the results by UUT, Serial No and other User defined parameters.
|
Dataset This field displays the dataset that the User selected and successfully connected to on Login.
To change datasets select the Change Dataset button under Settings or double-click in the area of Connected to Dataset: text .
|