Mission Control

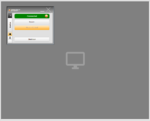
Use Mission Control to position applications on the screen/s and then save the set positions as a defined profile.  Each application has its own icon in Mission Control's task-bar.  Drag the application's icon onto the Mission Control Grey screen.  If the application is open, then the icon will change into thumbnail of the current application's screen; this will remain updated while the application is open.
 
Mission Control
1
Mission Control Screen
1. Mission Control Screen
The Grey screen shows the Screen space available (this example shows one screen), and the available positions for NODES™ applications.  The screen shows SPIDER™ already positioned in the top left of the available screen.
2
SPIDER™
2. SPIDER™
Each application is represented to scale on the available screen space.  If the application is open (as shown here), then it will show a screenshot of the application while it remains open; if it is closed, then the icon will be shown on the screen space as a holding image.  Moving the actual application on the OS Desktop, will reposition the application's holding image within the Mission Control screen accordingly.
3
Mission Control NavBands
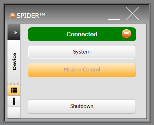
3. Mission Control NavBands
Select to open the Mission Control NavBands.
4
Mission Control Task Bar
4. Mission Control Task Bar
The Mission Control's Task Bar shows the applications available to display on the Mission Control's available screen.  Drag the icon from the Task Bar to the available screen and position as required.  Save the configuration as a new profile under the Mission Control NavBands.

Made with help of Dr.Explain