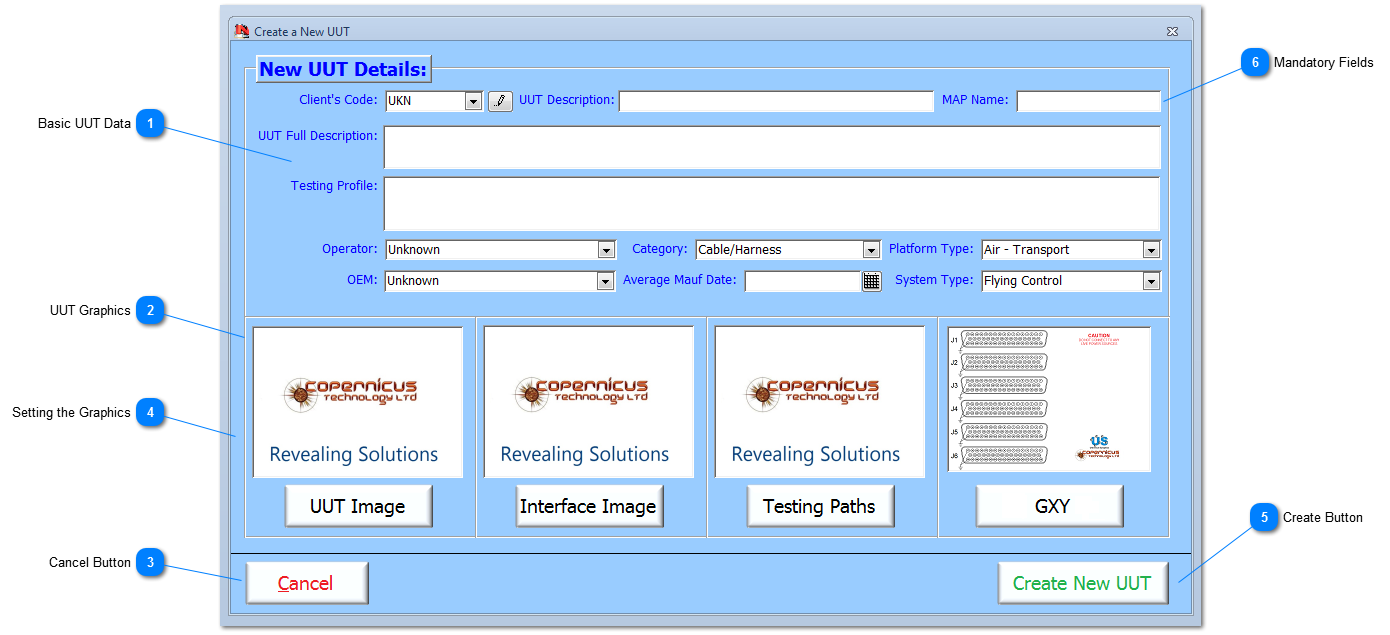
Enter the outline data in these fields. Mandatory fields are UUT Description and Map Name. All fields can be edited at a later data from the UUT Add/Edit form.
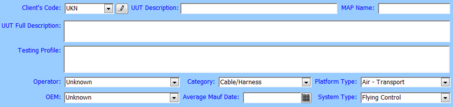
Each UUT can have up to 4 graphics. These are the UUT Image, the Interface Image, the Testing Paths and the GXY graphic. The GXY graphic is mandatory and it has to be a Portable Network Graphic (.PNG) or Windows Bitmap format (.BMP), and no larger than 4k; it is recommended that the default format PNG is used because these files are smaller lossless compression format which improve performance overall. This GXY graphic is used during testing to show graphically the results of the tests being performed. The other graphics are made available to help the User readily identify the UUT. The UUT Image can be displayed in some of the reports as part of the report's header as an option defined by the User.
Each graphic can be changed by clicking on its associated named button. This will open a Windows dialog which will allow the User to navigate to the desired graphic. The User must ensure that the graphics are valid graphic images and they are held in the designated folders; see Folder Structure for more details.
The UUT Description and the MAP Name are mandatory fields. The MAP Name has to be unique within the current dataset and be no more than 8 characters long; the following characters are not allowed in the MAP Name [space] \ /:<>'' ! ; # & ' * + ? | _
In addition, the letter 'G' at the end of a MAP Name is also reserved for self-test and OEM testing.